The Roadmap & Jira two-way integration pushes ideas created in Roadmap to tickets in your Jira projects.
With the Jira integration for roadmaps, product teams increase transparency without over-complicating the experience for non-technical stakeholders. The Roadmap integration for Jira keeps stakeholders in the loop with notifications when there’s progress from Jira.
Why It Matters
Jira is a massive (and helpful!) product for development teams to get things done. However, it’s not a tool designed to communicate with non-technical teammates or users.
The Roadmap & Jira integration works across the organization to collect feedback, track ideas, and align stakeholders around progress from Jira.
How It Works
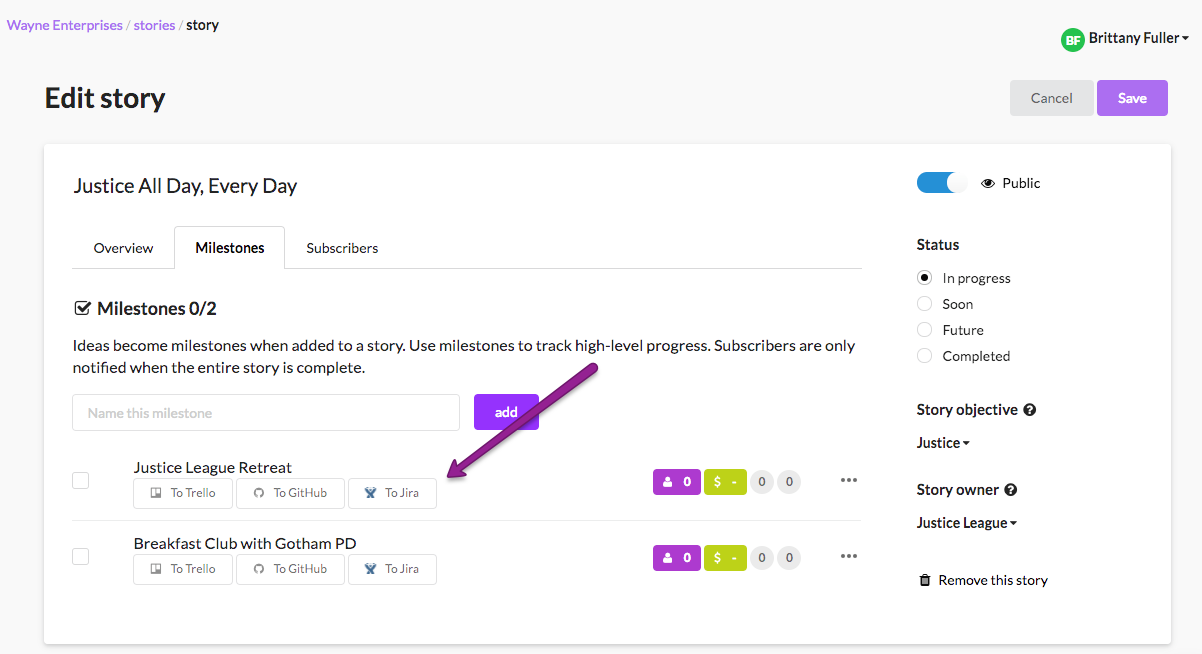
Once you enable the integration, you’ll be able to push ideas from your backlog or stories to create high-level tickets in Jira. Customize in integration settings whether you’d like to push ideas:
- as soon as an idea is created or
- when an idea is added to a story or
- manually
The manual option is best if you’re using multiple project management tools such as Jira and Trello together. If you’re using the manual option, each idea will have the option to be pushed to Jira once it is added to a story.

When tickets are completed in Jira, progress is automatically tracked in Roadmap. You can turn on and customize notifications to be sent automatically to your team and/or your app users.

Get Started
Step 1: Creating an Application Link in Jira
From the Jira Dashboard on the left, click on Jira Settings -> Products -> Application Links
The application link is https://roadmap.space
If at first you see a not responding error, simply click continue.
- Application Name: Roadmap
- Application Type: Generic Application
- Check the checkbox for “Create Incoming Link”.
Click the Continue button.
- Consumer Key: dpf43f3p2l4k3l03
- Consumer Name: Roadmap
On the Jira integration page in Roadmap, you’ll find your public key. Copy and paste your public key into the “Public Key” field in Jira. Be sure to include the entire key, including the BEGIN & END parts.
Note: If there is a firewall between your Jira server and the internet, you’ll need your system admininistrator to allow traffic from our IP addresses. Reach out to us at support@roadmap.space or via the in-app messenger for the IP addresses.
Note: If you are self-hosting with a non-https endpoint the integration will not work. It is strongly recommended to use https.
Step 2: Creating a Jira integration on Roadmap
Enter your Jira base URL for your corresponding installation type. To install the Jira integration for product roadmaps, go to Settings –-> Integrations –-> Connect.

(a) Cloud (Jira OnDemand): in this case Jira is hosting your app for you and you have a URL similar to https://company.atlassian.net.
(b) Self-hosted: in this case you’re hosting your Jira installation and your URL is similar to https://company.com/jira.
Step 3: OAuth with Jira
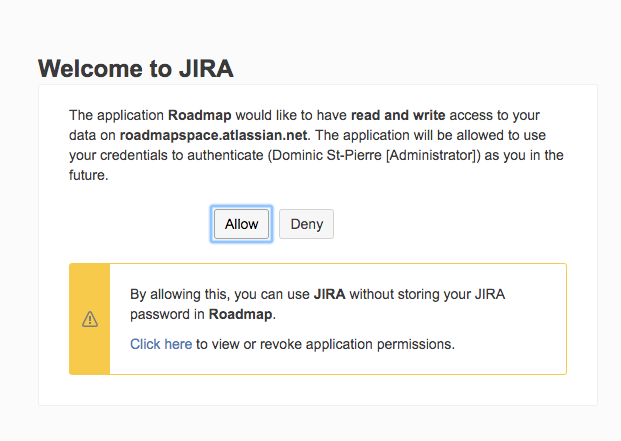
Once you’ve set up the Application Link, return to Roadmap to continue setting up the integration. You’ll be asked to authorize the connection between Roadmap and Jira.

Step 4: Map to a Jira project
In this step you’ll see a list of your Jira projects and issue types. If you’re using more than 1 roadmap you can create separate Jira integrations with multiple projects.
Select the Jira project where ideas should be created and select the issue type you’d like to create. Select an issue type that has a summary and description field and there aren’t other required custom fields.*If you have additional custom fields you’d like to map from ideas, let us know and we’ll help you get them set up.
Step 5: Create a webhook to track closed tickets (optional)
Create a webhook with Jira to track ideas as completed in Roadmap when the ticket is closed in Jira. Use the URL provided on the integrations page in Roadmap. Learn more about how to create a webhook in Jira’s documentation here.
- The webhook URL is available from the Jira integration page in Roadmap
- Select Issue Type = Updated as the only event type Roadmap needs to receive to mark ideas as complete
Feedback ❤️
Love to use Roadmap & Jira together? Have some ideas to make this integration even better? We’d love to hear from you!